A modified mat nursery establishes rice seedlings in a layer of soil mix, arranged on a firm surface. Seedlings are ready for planting within 15-20 days after seeding. This technique uses less land, can be installed closer to the house than traditional field nurseries, and uses less labor for both transporting seedling mats and replanting. As a result, root damage is minimal while separating seedlings.
Preparing a modified mat nursery
Producing healthy seedlings is a challenge many farmers face. To help meet this challenge, scientists from the International Rice Research Institute (IRRI; http://irri.org) and the Tamil Nadu Agricultural University -- http://www.tnau.ac.in/ -- in India have developed a best practice in crop establishment: growing seedlings in a modified mat nursery.
In this video, you will learn how to establish a modified mat nursery, and its benefits and limitations. But first, what is a modified mat nursery?
A modified mat nursery establishes seedlings in a layer of soil mix, arranged on a firm surface. Seedlings are ready for planting within 15 to 20 days after seeding.
But what are the advantages of a modified mat nursery over traditional wet-bed field nurseries?
First, the modified mat nursery uses less land, and can be established right in your own backyard, or in a small section of your main field.
It requires fewer seeds and lower amounts of inputs such as fertilizer and water, thus reducing nursery costs by up to 50%.
Separating seedlings before transplanting is easier, thus minimizing root damage.
And, most importantly, a modified mat nursery produces healthier and faster-growing seedlings, which produce higher yields.
Now that you know the benefits, here are ten easy steps to establish a modified mat nursery.
Step 1: Use good-quality seeds.
To plant 1 hectare with 1 to 2 seedlings per hill, 20 centimeters apart, use 12 to 25 kilograms of good-quality seeds with a minimum germination rate of 80%.
It is important to use good seeds because they result in a lower seed rate, more uniform germination, less replanting, fewer weeds, healthy seedlings, and 5--20% higher yields.
Step 2: Pre-germinate your seeds.
Soak your seeds for 24 hours. Some varieties may need a longer time to bud. Drain the water after 24 hours and keep the seeds moist by covering them for another 24 hours. By this time, the seeds will have sprouted buds and the first seed root will be about 2 to 3 millimeters long.
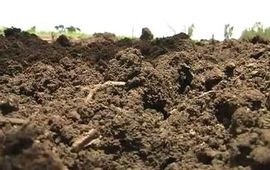
Step 3: Prepare the soil mixture.
You need 4 cubic meters of soil mix for every 100 square meters of nursery area. Mix 70--80% soil plus 15--20% well-decomposed organic manure plus 5--10% fresh or charred rice hull. That is, mix 7 pails of soil with 2 pails of manure, preferably chicken manure, and 1 pail of fresh or charred rice hull.
Step 4: Prepare the nursery area.
Prepare a 100-square-meter nursery area for every 1 hectare to be planted. Select a level area in your backyard or in the main field.
Step 5: Lay the soil mixture.
You can do this with or without using a wooden frame. If you use a wooden frame, place the frame on top of the banana leaves.
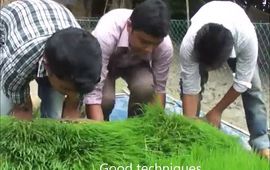
Step 6: Sow the pre-germinated seeds uniformly.
Sprinkle soil and pat gently to embed the seeds at about 2--3 cm into the soil. Then, sprinkle water immediately.
Step 7: Remove the wooden frame and repeat laying the soil mixture and sowing seeds until you have finished the whole nursery area.
For those who prefer not to use a wooden frame, you can use banana stalks instead.
Step 8: Water the nursery twice a day for 5 days and keep it covered with banana leaves or rice straw to keep the soil moist. Make sure that you protect the nursery from heavy rains for the first 5 days after seeding.
Step 9: Five days after seeding, remove the cover and flood the nursery.
Maintain a 1-centimeter water level around the mats. Then, drain the water 2 days before removing the seedling mats for transplanting. If your seedlings show yellowing after 7 days, it means they lack nitrogen.
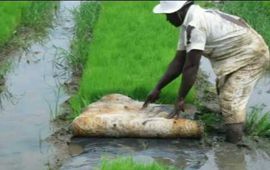
Step 10: About 15 to 20 days after seeding, your seedlings are tall enough and at the ideal 4-leaf stage, ready for transplanting. Now, you can either transport the seedling mats as such or pull them gently and transport them to the field.
International Rice Research Institute
Video, English, Crop establishment, Irrigated lowland, Learning
18 years, 3 months ago
08:38